So you’ve set up your social wall. Content’s flowing in, moderation’s working, everything looks great on your dashboard.
Now the question: how do you actually get it on your website?
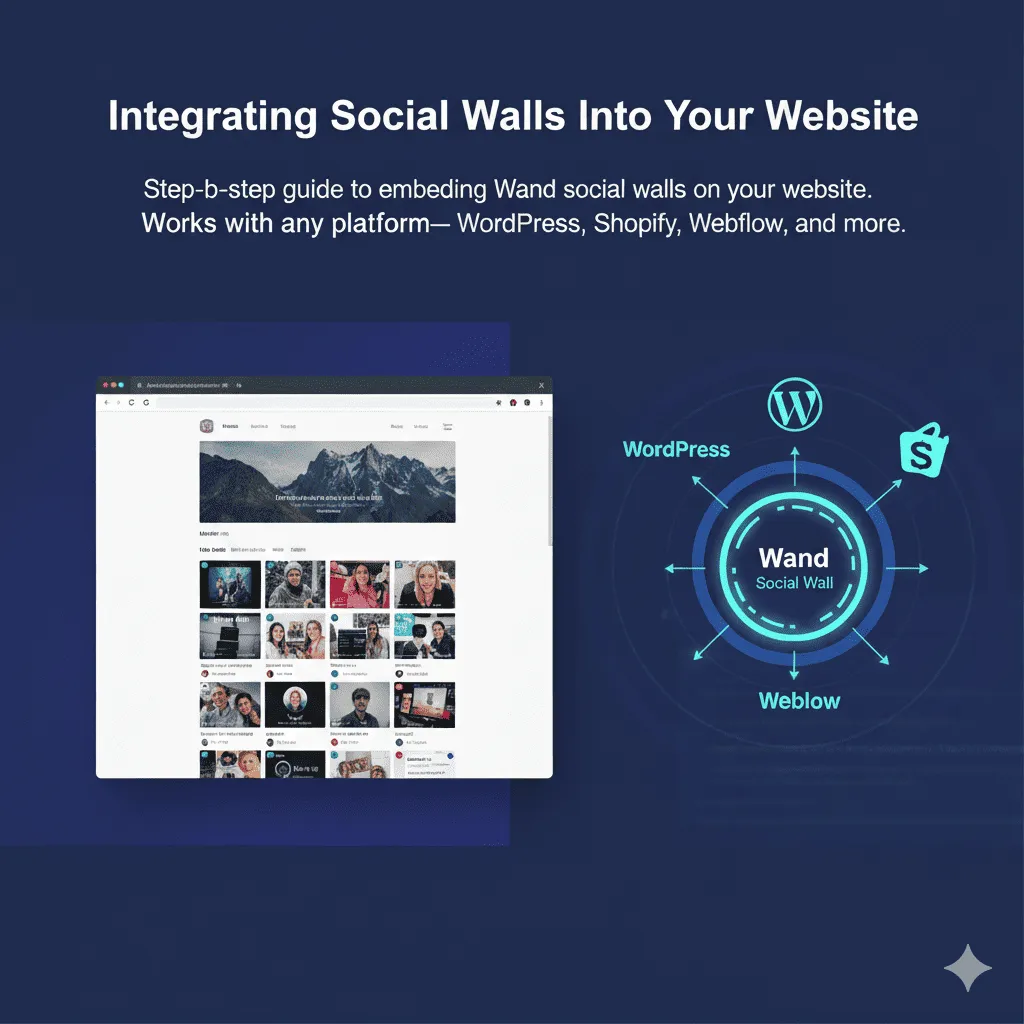
Good news: it’s way easier than you think. Whether you’re running WordPress, Shopify, a custom Next.js site, or literally anything else, there’s a straightforward path. Let’s walk through it.
Two ways to embed (and which to use)
Wand gives you two options for embedding your social wall. They both show the same content, but work differently under the hood.
iFrame embed (recommended for most people)
This is the easiest and most reliable option. One line of code, works everywhere, no complications.
Why use this:
- Works absolutely everywhere (WordPress, Shopify, Wix, Webflow, anything)
- Can’t conflict with your site’s code
- Super simple—just one line of HTML
- Content is sandboxed (extra security)
- No JavaScript dependencies to worry about
- Automatically responsive with proper setup
The code:
<iframe
  src="https://embed.wand.social/wall/your-wall-id"
  width="100%"
  height="800"
  frameborder="0"
  style="border: none;">
</iframe>
That’s it. Paste it where you want the wall to appear. Done.
We handle all the heavy lifting—loading posts, updating in real-time, responsive layouts, everything. You just drop in the code.
Making it responsive:
For a fully responsive iframe that adapts to your content, wrap it in a container:
<div style="position: relative; padding-bottom: 100%; height: 0; overflow: hidden;">
  <iframe
    src="https://embed.wand.social/wall/your-wall-id"
    style="position: absolute; top: 0; left: 0; width: 100%; height: 100%; border: none;"
    frameborder="0">
  </iframe>
</div>
Adjust the padding-bottom percentage to control the aspect ratio (100% = square, 56.25% = 16:9, etc.).
API integration (for developers)
Want full control? Our API lets you fetch posts and build your own display.
Why use this:
- Complete customization of look and feel
- Can integrate directly into your app’s data layer
- Build custom features on top of the content
- Server-side rendering friendly
Basic example:
fetch('https://api.wand.social/v1/walls/your-wall-id/posts', {
  headers: {
    'Authorization': 'Bearer your-api-key'
  }
})
.then(res => res.json())
.then(data => {
  // You now have the posts, do whatever you want
  console.log(data.posts);
});
You get back clean JSON with all the post data—images, text, timestamps, author info, everything. Build whatever display you want.
Note: Our full SDKs (JavaScript, React, Vue) are coming soon. For now, the REST API is your best bet for custom integrations.
Platform-specific guides
Let’s get practical. Here’s exactly how to add Wand to the most popular platforms.
WordPress
Two options here: the easy way or the flexible way.
Option 1: Block editor (Gutenberg)
- Go to the page where you want the wall
- Add a “Custom HTML” block
- Paste your iframe embed code
- Publish
That’s it. The wall appears immediately.
Option 2: Theme template (for permanent placement)
- Go to Appearance → Theme File Editor
- Find the template you want to edit (header.php, footer.php, page.php, etc.)
- Paste the iframe code where you want it
- Save
Pro tip: Add it to your footer.php if you want it on every page. Add it to a specific page template if you only want it in one place.
If your theme doesn’t let you edit files (some page builders are restrictive), use the Custom HTML widget in your sidebar or footer area instead.
Shopify
Shopify makes this pretty straightforward.
For a specific page (like homepage):
- Go to Online Store → Themes → Customize
- Navigate to the page you want to edit
- Add a “Custom Liquid” or “Custom HTML” section
- Paste your embed code
- Save
For product pages:
- Go to Online Store → Themes → Edit code
- Find product-template.liquid (or main-product.liquid in newer themes)
- Paste the code where you want the wall (usually after product description)
- Save
Common use case: showing customer photos on product pages. Increases conversion by about 25% based on what we’ve seen.
Webflow
Webflow’s pretty developer-friendly, so this is easy.
- Open your Webflow project
- Go to the page where you want the wall
- Add an “Embed” element (under Components)
- Paste your iframe embed code
- Publish
The iframe works perfectly in Webflow. If you want to customize the container styling, you can wrap the embed in a div and style that.
Wix
Wix works great with iframes.
- Open your site editor
- Click the ”+” to add an element
- Go to “Embed” → “HTML iframe”
- Paste the iframe code
- Adjust size/position as needed
Works perfectly. The iframe approach is ideal for Wix.
Squarespace
- Edit the page where you want the wall
- Add a “Code” block
- Paste your iframe embed code
- Save and publish
Works perfectly on Squarespace 7.0 and 7.1. No issues.
Custom sites (React, Next.js, Vue, etc.)
If you’re running a custom site, you’ve got options.
Option 1: Use the iframe (simplest):
Just drop the iframe code into your component. Works everywhere, no special handling needed.
React/Next.js example:
export default function SocialWall() {
  return (
    <div className="social-wall-container">
      <iframe
        src="https://embed.wand.social/wall/your-wall-id"
        width="100%"
        height="800"
        frameBorder="0"
        style={{ border: 'none' }}
        title="Social Wall"
      />
    </div>
  );
}
Option 2: Use the API directly (for full control):
// Server component (Next.js)
async function SocialWall() {
  const res = await fetch('https://api.wand.social/v1/walls/your-id/posts', {
    headers: { 'Authorization': 'Bearer your-key' },
    next: { revalidate: 60 } // Cache for 60s
  });

  const data = await res.json();

  return (
    <div className="grid grid-cols-3 gap-4">
      {data.posts.map(post => (
        <div key={post.id}>
          <img src={post.image} alt={post.text} />
          <p>{post.text}</p>
        </div>
      ))}
    </div>
  );
}
Full control. Build it however you want.
Styling and customization
Out of the box, Wand looks good. The iframe displays your social wall with responsive layouts and smart defaults.
Customizing the iframe container:
You can style the container around the iframe to match your site:
.social-wall-container {
  max-width: 1200px;
  margin: 0 auto;
  padding: 2rem;
  background: #f5f5f5;
  border-radius: 12px;
}

.social-wall-container iframe {
  border-radius: 8px;
  box-shadow: 0 4px 12px rgba(0,0,0,0.1);
}
Customizing the wall itself:
Want to change colors, layouts, or other settings? Configure these in your Wand dashboard. Changes apply instantly to your embedded wall—no need to update any code.
You can customize:
- Layout style (masonry, grid, carousel)
- Color scheme and branding
- Number of columns
- Post spacing and sizing
- What metadata to display
- Maximum number of posts
Everything updates in real-time across all your embeds.
Performance considerations
A social wall can slow down your site if you’re not careful. Here’s how to keep things fast:
Lazy loading:
By default, Wand only loads posts as they come into view. This keeps initial page load fast. Don’t disable this unless you have a good reason.
Image optimization:
We automatically optimize and resize images on our end, so you’re never loading full-resolution Instagram photos. But if you’re using the API, make sure you’re requesting appropriate sizes:
fetch('https://api.wand.social/v1/walls/your-id/posts?image_size=medium')Caching:
If you’re using the API, cache the responses. Posts don’t change every second. A 60-second cache is usually fine:
// Next.js example
{ next: { revalidate: 60 } }

// Or use your own caching layer
Limit posts:
Don’t load 500 posts at once. Start with 20-30, then load more as users scroll.
Common issues (and fixes)
Wall not showing up:
- Check that your wall ID is correct in the iframe src
- Make sure the iframe code is properly pasted (no missing characters)
- Check if your CMS is stripping the iframe code (some security plugins do this)
- Try viewing the iframe URL directly in your browser to verify the wall exists
Content is outdated:
- Could be your CDN caching too aggressively
- Check that you’ve approved recent posts in your moderation queue
- Our updates are near-instant, so if content isn’t updating, it’s usually a caching issue on your end
iframe height is wrong:
- Adjust the
heightattribute to show more or less content - For dynamic height, use the responsive wrapper shown earlier
- Some platforms (like Wix) let you set height in their editor—use that instead
iframe not responsive on mobile:
Use the responsive wrapper code shown earlier in this guide. It makes the iframe scale properly on all devices.
Security considerations
Iframes are inherently secure because they’re sandboxed—the content inside can’t access your site’s data or scripts.
If you’re security-conscious (you should be), here’s what we do:
- All content is moderated before display (you control this in your dashboard)
- Links in posts are marked as
rel="nofollow"by default - User-generated text is sanitized to prevent XSS
- Images are proxied through our CDN (not loaded directly from social platforms)
- Iframe content is completely isolated from your main site
- API keys (if you use the API) are scoped as read-only by default
The iframe approach is actually one of the most secure ways to embed third-party content. Your site stays protected even if something goes wrong on our end.
If your security team needs more details, send them to our security documentation.
Testing before going live
Always test on staging first. Here’s a quick checklist:
- ✓ Wall appears in the right location
- ✓ Layout looks good on desktop, tablet, and mobile
- ✓ Colors match your brand
- ✓ Clicking posts opens them correctly
- ✓ New posts appear (make a test post to verify)
- ✓ Page load time hasn’t increased significantly
- ✓ No JavaScript errors in console
- ✓ Works in Safari, Chrome, Firefox, Edge
If all those check out, you’re good to go live.
What actually matters
Look, you can spend days perfecting your social wall integration. Custom layouts, perfect spacing, elaborate animations.
Or you can paste the embed code, make sure it doesn’t break anything, and ship it.
The content matters more than the implementation. A social wall with great user-generated content and basic styling will outperform a beautifully designed wall with mediocre content every time.
Get it on your site. Make sure it works. Then focus on getting great content flowing in.
Everything else is just polish.
Ready to add your wall to your site? Log into your Wand dashboard and grab your embed code. Takes about 2 minutes to implement. No developer needed (but if you are a developer, we’ve got APIs and customization options for days).